The destination of printed issues is controlled by the print command which is configurable via the Print Setup... option of the File pulldown. Selecting this option will display a Print Setup dialog similar to the one below..

Enter the appropriate command for your system into the Print command and click OK. The print command will receive the contents of the information to print on stdin.
In the upper right corner of each issue form is a Print button. Selecting that button will cause a copy of the issue to be printed.
The format of the printed issue is controlled by a shell script (rz_issue_print), so you have a good degree of flexibility in how this is handled. You are free to write your own rz_issue_print script and place it earlier on your search path. Details on this and other such customizations are covered in "Writing Your Own Shell Scripts" on page 219
The destination of the printed issue is controlled by the user's print command which is configurable via the Print Setup... item of the File pulldown menu.
The Reports menu bar option on the main display pulls down to a collection of locally defined shell scripts which can be run against the items selected on the main list.1

When activated off the menu bar, the selected report will only be generated for the issues you have selected from the main display list, and it will be run against the issues in the order they appear. Through combinations of filtering and sorting the collection (discussed previously) you have great control over the scope of the report.
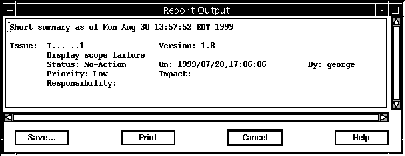
Depending on how the report script has been attached for use, you may see a small popup which gives an indication of which issue is being worked on. Once completed, a window such as the one below may appear, containing the output of the report. If the report script is attached to automatically print, the output is not made visible but instead is sent directly to the print command.2.

The output may be printed by clicking the Print button located at the bottom of the window. If you wish, you may also use the Save button. It allows you to identify the name and location of a file where the results of the report can be saved, perhaps for future printing or e-mailing to other team members.

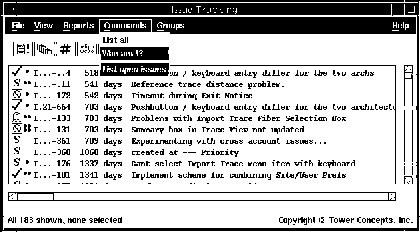
If the $RAZOR_UNIVERSE_DIR/DOMAIN_01/<group>/Tables/Commands3 file exists, then the commands it defines will be listed in a Commands pull-down menu on the main display. Selecting from the menu will simply invoke the command as defined in the Commands file. The result is presented to the user in an output window. To add a visual separator to the list, put the SEPARATOR tag on a line by itself in the Commands file. Below is an example of the main issues display with the Commands menu.

Who am I?whoami
...in case you forget. The list of issues selected from the GUI is made available to the script via the environment variable $RAZOR_FILE_LIST.
You may have more than one database in which to create issues. If so, create a file named Databases in the $RAZOR_LICENSE_DIR directory. Refer to "Databases (issues only)" on page 260 for the format of this file. Upon the next invocation of the issues tool, the Database selection list will be available on the menu bar. When a different database is selected, the current issues database will be exited and the new one will be accessed. The database server must be running to access its issues. Now the Database menu item on the main issues screen will be enabled; selecting that menu will display all possible database choices.
You may find it necessary to keep track of different kinds of information in one database. Putting everything on one form causes confusion or makes the form too lengthy. Razor supports the creation of multiple forms with different attributes against one database. To make use of different issues forms, you will need to create an issues group for each form. With the database server down, simply run the script rz_add_issues_group.4 You will be given the opportunity to select a different prefix letter for each issues group. You can then edit the appropriate Attributes file to create unique forms. The Attributes file will be found in $RAZOR_UNIVERSE_DIR/DOMAIN_01/ ++ISSUES++.<group>/Tables/Attributes.
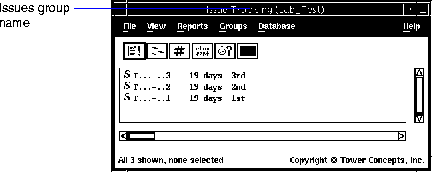
Once you have created an issues group, the Groups menu will appear on the menu bar of the issues tool. Selecting a group other than the default will subscribe to that group's issues and the name of this newly selected group will appear in the title bar. Just select and go. Below is an example of selecting the Lab_test group.

|
(Part 7 of 8 for this section) (Generated 09/13/99 at 17:39:24) |
|||
|
Copyright Tower Concepts http://www.tower.com Voice: 315-363-8000 Fax: 315-363-7488 support@tower.com sales@tower.com |